Creating homemade buttermilk is a simple and rewarding process. This tangy, versatile ingredient, a staple in baking and cooking, can easily be made with just two ingredients you likely already have in your kitchen: milk and an acid, such as lemon juice or vinegar.
Gathering Your Ingredients
You’ll need one cup of milk – whole milk works best for a creamier texture, but low-fat or even non-dairy milk can also be used for different dietary needs. Additionally, one tablespoon of lemon juice or white vinegar is required to acidify the milk and mimic the natural fermentation of traditional buttermilk.
Mixing Milk and Acid
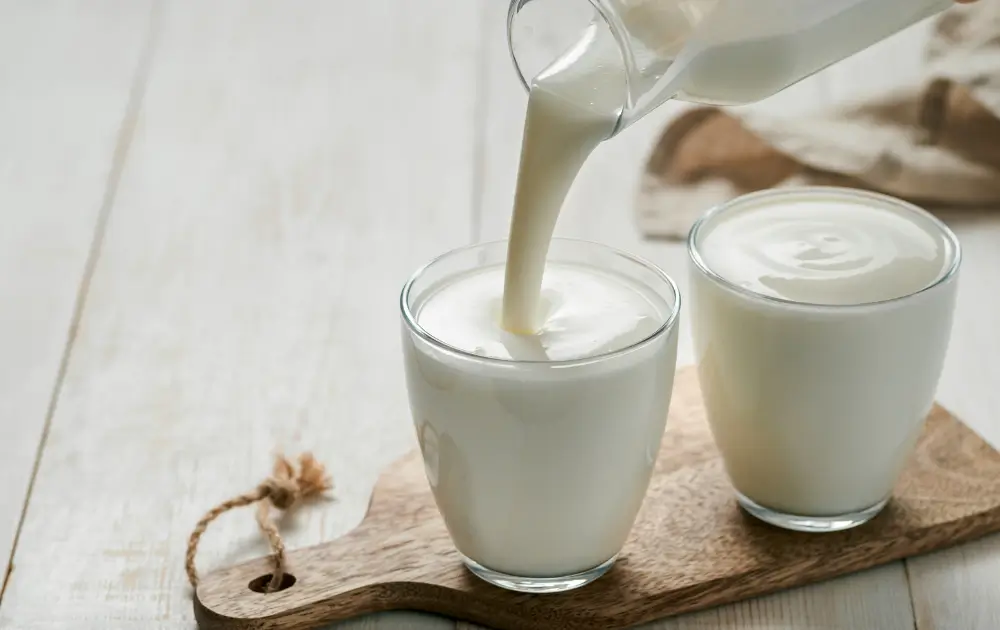
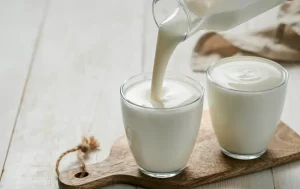
In a measuring cup or bowl, you add the tablespoon of lemon juice or vinegar. Then, you pour in the milk until the mixture reaches the one-cup mark. Stirring gently, you combine the two, ensuring they’re well mixed.
Letting the Mixture Sit
After mixing, you let the concoction sit at room temperature for about 10 minutes. During this time, the acid begins to react with the milk, causing it to curdle slightly and thicken, achieving the classic buttermilk consistency.
Checking Consistency and Flavor
Once the mixture has rested, you’ll notice the milk has thickened and has a tangy flavor reminiscent of traditional buttermilk. This homemade version is now ready to be used in any recipe that calls for buttermilk.
Storage and Usage Tips
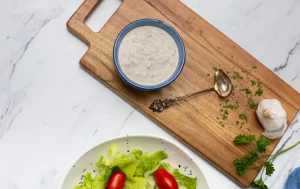
Homemade buttermilk can be stored in the refrigerator for up to a week. It’s perfect for making tender baked goods, creamy dressings, or marinating chicken to enhance moisture and flavor.
Creating homemade buttermilk not only saves a trip to the store but also allows for customization in fat content and acidity, making it a handy trick for any cook’s repertoire. Whether you’re whipping up pancakes, dressing a salad, or tenderizing meat, this homemade buttermilk is sure to become a kitchen staple.
Crafting Homemade Buttermilk
Embarking on the journey of making homemade buttermilk opens up a realm of culinary possibilities. This staple ingredient, known for its tangy flavor and tenderizing properties, is surprisingly simple to create with just two ingredients found in most kitchens.
Selecting Your Base
You begin with fresh milk, choosing between whole milk for a richer texture or skim milk for a lighter version. The choice of milk affects the final fat content of your buttermilk, allowing you to tailor it to your dietary preferences or specific recipe needs.
Adding the Acid
To transform the milk into buttermilk, you introduce an acid. Lemon juice or white vinegar are the most commonly used options due to their accessibility and effectiveness in curdling the milk. This process mimics the natural fermentation that traditional buttermilk undergoes, resulting in a similar tangy flavor profile.
Mixing Ingredients
You measure out one tablespoon of lemon juice or vinegar, adding it to one cup of milk. This ratio ensures the right level of acidity to achieve the desired curdling effect. After adding the acid, you stir the mixture gently, ensuring the acid is evenly distributed throughout the milk.
Letting It Sit
Patience plays a key role as you let the mixture sit at room temperature for about 10 to 15 minutes. During this time, the acid begins to react with the milk, causing it to curdle and thicken slightly. This waiting period is crucial for developing the characteristic tangy taste and thicker consistency of buttermilk.
Stirring and Checking Consistency
After the resting period, you observe the transformation. The milk becomes slightly thicker, with a curdled appearance, closely resembling commercial buttermilk. A final stir ensures that any larger curds are broken up, creating a smoother texture.
Usage and Storage
Your homemade buttermilk is now ready to use in a variety of recipes, from fluffy pancakes and tender baked goods to creamy dressings and marinades. If not using immediately, you store the buttermilk in the refrigerator, ensuring it’s well-sealed. It typically keeps well for about one to two weeks, ready to enrich your dishes with its creamy tanginess.
Exploring Variations
As you become more comfortable with making homemade buttermilk, you might experiment with different types of acid, such as lime juice for a slight citrus hint or cream of tartar for a more neutral flavor. Each variation offers a unique twist, allowing you to customize the buttermilk to suit specific recipes or personal taste preferences.
Homemade buttermilk not only serves as a versatile ingredient in your cooking repertoire but also stands as a testament to the simplicity and satisfaction of creating kitchen staples from scratch. Through this process, you engage with the fundamental aspects of cooking, embracing both the science and art that come together in the transformation of basic ingredients into culinary gold.
Embracing Sustainability
By making your own buttermilk, you contribute to a more sustainable kitchen practice. Instead of purchasing single-use cartons, you utilize milk that you already have, reducing waste and the need for additional packaging. This approach aligns with eco-conscious cooking habits, emphasizing the use of ingredients to their full potential and minimizing your environmental footprint.
Enhancing Flavor Profiles
As you integrate homemade buttermilk into your recipes, you notice a depth of flavor that enhances your dishes. The slight tang and creaminess of the buttermilk elevate baked goods, making them more tender and moist. In savory dishes, it adds a subtle complexity that balances richness and acidity, showcasing how a simple ingredient can transform the overall taste experience.
Sharing the Knowledge
Encouraged by the success of your homemade buttermilk, you share this knowledge with friends and family. Whether through cooking together, exchanging recipes, or simply discussing the joys of homemade ingredients, you inspire others to explore the possibilities within their own kitchens. This sharing of culinary insights fosters a community of learners and enthusiasts who appreciate the value of crafting ingredients from scratch.
Customizing to Dietary Needs
Recognizing the diversity of dietary preferences and restrictions, you explore alternatives to cow’s milk for making buttermilk. Almond milk, soy milk, or coconut milk can be used with an acid to create dairy-free buttermilk alternatives. These options provide a way for those with dairy intolerances or vegan diets to enjoy the benefits of buttermilk in their cooking and baking, further illustrating the adaptability of this technique.

Celebrating Culinary Creativity
Each batch of homemade buttermilk sparks creativity in your culinary endeavors. You experiment with it in new recipes, adjusting traditional ones, and even creating your own. This ingredient becomes a catalyst for culinary exploration, challenging you to think outside the box and experiment with flavors, textures, and techniques.
Reflecting on the Journey
Through the process of making homemade buttermilk, you reflect on the broader journey of cooking and the satisfaction derived from creating ingredients with your own hands. It’s a reminder of the connection between food and the care we put into it, reinforcing the idea that the best meals come from not just the ingredients themselves, but the intention and passion behind them.
Making homemade buttermilk represents more than just a culinary task; it embodies a philosophy of cooking that values freshness, customization, and sustainability. It encourages a mindful approach to food, where even the simplest ingredients are treated with respect and creativity, leading to meals that are not only delicious but meaningful.
Fostering a Mindful Approach to Cooking
You recognize that making homemade buttermilk goes beyond just combining milk and an acid; it’s about adopting a more thoughtful approach to what you eat. By choosing to create this staple ingredient yourself, you actively participate in each step of your meal’s creation, fostering a deeper connection with your food. This mindfulness extends to selecting ingredients, considering their sources, and appreciating the effort that goes into every dish.
Experimenting with International Cuisines
Your adventure with homemade buttermilk opens doors to international cuisines. You explore recipes from around the world that utilize buttermilk in unique ways, such as Indian marinades, Russian dressings, or Middle Eastern dips. Each recipe not only broadens your culinary repertoire but also introduces you to new flavors and traditions, enriching your cooking experience.
Teaching and Learning
As you master the art of making buttermilk, you become a resource for others interested in homemade ingredients. Teaching friends or family members how to make their own buttermilk becomes an opportunity for shared learning and bonding over food. These moments of teaching and learning reinforce the communal nature of cooking, highlighting its role in bringing people together.
Innovating in the Kitchen
With a steady supply of homemade buttermilk at your disposal, you feel encouraged to innovate. Perhaps you develop a new buttermilk-based salad dressing that becomes a hit at family gatherings or a buttermilk-infused cake that sets a new standard for dessert at your dinner parties. Your kitchen becomes a laboratory where traditional recipes are reimagined and new favorites are born.
Appreciating Seasonal Changes
Your use of homemade buttermilk evolves with the seasons. Light, refreshing buttermilk dressings enhance summer salads, while rich, buttermilk-based stews provide comfort during the winter months. This seasonal approach maximizes the flavors and benefits of your homemade buttermilk, aligning your cooking habits with the rhythms of nature.
Reflecting on Sustainability
The decision to make buttermilk from scratch reflects a broader commitment to sustainability. By reducing reliance on packaged products, you not only cut down on waste but also contribute to a food system that values freshness and minimal processing. This commitment influences other aspects of your cooking, inspiring you to seek out local ingredients, reduce food waste, and make more from scratch.
Celebrating Every Success
Each successful batch of homemade buttermilk is a cause for celebration. It represents not just the completion of a recipe but the culmination of choices that prioritize quality, creativity, and sustainability in the kitchen. These successes, big and small, are reminders of the joy and satisfaction that come from cooking with intention and care.
Through the simple act of making buttermilk, you engage deeply with the culinary process, discovering new flavors, sharing knowledge, and embracing a mindful approach to eating. This journey is a continuous exploration of what it means to cook and eat in a way that nourishes both the body and the spirit.
FAQs about Homemade Buttermilk
Can I use any type of milk to make buttermilk? Yes, you can use any type of milk to make buttermilk, including whole milk, 2%, skim, and even non-dairy milk alternatives. The fat content of the milk will affect the richness of the buttermilk.
How long does homemade buttermilk last? Homemade buttermilk can last in the refrigerator for up to two weeks. Make sure to store it in a sealed container and smell it before use to ensure it’s still fresh.
Can I freeze homemade buttermilk? Yes, you can freeze homemade buttermilk. Pour it into an ice cube tray, freeze, and then transfer the cubes to a freezer bag. Use as needed by thawing in the refrigerator.
What can I do if my buttermilk doesn’t thicken? If your buttermilk doesn’t thicken, ensure that you’ve given it enough time to react and that you used the correct ratio of acid to milk. Higher temperatures can speed up the process, so letting it sit in a warmer spot might help.
Is there a difference in taste between store-bought and homemade buttermilk? Homemade buttermilk tends to have a fresher taste and can be less sour than store-bought versions, depending on the type of acid used and the fermentation time.

Conclusion
Creating homemade buttermilk represents a return to the basics, a celebration of simplicity in the kitchen that results in a versatile and cherished ingredient.
Whether used in baking, cooking, or as part of a marinade, buttermilk adds a touch of tanginess and tenderness to dishes, elevating flavors and textures.
The process of making buttermilk at home not only deepens your connection to the food you prepare but also opens up a world of culinary possibilities, encouraging experimentation and discovery.
By embracing homemade buttermilk, you take an active step towards more sustainable, mindful, and flavorful cooking, reaping the rewards of a well-stocked kitchen where quality and creativity reign supreme.
Print
Homemade Buttermilk
- Author: recipstep
- Total Time: 5 minutes
- Yield: 1 cup 1x
- Diet: Vegetarian
Ingredients
1 cup whole milk (240mL)
1 tbsp lemon juice (15mL), or white vinegar
Instructions
Add the milk to a jar.
Pour in a tablespoon of lemon juice or vinegar.
Stir well.
Set aside for 10 minutes.
If using for recipes where consistency is crucial (e.g., buttermilk chicken or salad dressing), transfer to a sealable jar.
Shake well, then set aside for another 10 minutes.
Shake once more before using!
Notes:
– You can keep the buttermilk replacement in the fridge for up to a week or freeze it for up to two months.
– For a non-dairy version, substitute the milk with coconut milk.
– You can also use 3/4 cup sour cream or yogurt thinned out with 1/4 cup of water as a buttermilk replacement.
– If you don’t have lemon juice or vinegar on hand, you can mix 1 3/4 tablespoons of cream of tartar into the cup of milk, then follow the same steps above.
Notes
- For a vegan version, use any non-dairy milk like almond, soy, or coconut milk.
- The buttermilk will have a thicker consistency and tangier taste compared to plain milk, making it ideal for recipes that require buttermilk.
- Prep Time: 5 minutes
- Cook Time: 0 minutes
- Category: Ingredient
- Method: Mixing
- Cuisine: Global
Nutrition
- Calories: 103 kcal
- Sugar: 12 g
- Sodium: 105 mg
- Fat: 2 g
- Carbohydrates: 12 g
- Protein: 8 g
- Cholesterol: 12 mg